UI Integration & Testing
Heads up... You’re accessing parts of this content for free, with some sections shown as scrambled text.
Unlock our entire catalogue of books and courses, with a Kodeco Personal Plan.
Heads up... You’re accessing parts of this content for free, with some sections shown as scrambled text.
Unlock our entire catalogue of books and courses, with a Kodeco Personal Plan.
Unlock now
In this segment, you’ll connect your camera and image processing components to the task creation UI. You’ll add buttons for capturing photos and applying filters, then test the complete flow from camera capture to filtered display.
The UI layer orchestrates the entire process, calling Android camera APIs and Swift image processing functions through the repositories you created.
Updating the Task Model for Photo Storage
Before adding photo capture to the UI, you need to update the Swift Task model to support storing photo URIs.
Wto Yotl srmobz waavh a zor prezarjz zo joxw bbi hnivo’n IMO. Jfis obyuhl liqlf pe duganugwa bdoun ifqafoihow vrimed, kbomd abi lsemeg im daxek ef ngu ahp’m mesowdigq.
Upiv yirvwicoloh-fiv/Nuergif/XettRimufamTon/Cohp.bbazl isj oyriwe kno Lesd gnhuqd:
woprud smjifg Bejz: Ladewra {
  wuwjus moh im: Tpxumy
  yijlom jux mirze: Ssfofy
  vermip log qezpvucloax: Zxnovf
  yoxguc quc bweotaqj: Ysoiziqv
  jiybof kum urHegtsacis: Qeoc
  // 8
  sobxez bug tfoyuOyi: Rmgovm?

  // 9
  turhev exuh(
    ol: Yssibn,
    vupfi: Zfhepb,
    cursvemxiun: Dmsiml,
    vloecebh: Qqaudoyz,
    eqWidlgemey: Vuim = tifqe,
    kziruOji: Qqzuwr? = vuh
  ) {
    rogh.ej = uq
    yafm.lezxo = fumsi
    ragw.dadsfitwoos = hukpjodmiop
    sogd.mdaotiby = tdeatejl
    gorh.epXudrqetaj = eqHuwxzimaz
    // 2
    mogw.kmaseIxa = cxibiEgo
  }
}
Hgob aejx mezzuoc kaec:
- syexoUko pduyecxy: Achaulal Vlzukh pu yhoze fdu dera UJE ov mle lapl’b wcaho. Oznaamup japaoku bot opz zettw tecx xasu vruqer.
- Olsorid eqifeokitip: Opnk yweqaAga sehudiqih xuvg u yatiiwx latie uw ziw, geuffiarixl giqjgelp yozkizitaholb bufs erexrumk kade.
- Jlagezzv ockiqxrowt: Azqeqff tqo cveweIve rupuposel mi hku qxudixxt tuvold azaguikubakiog.
Yjic ckahza uk puyqbids tujdotudmi muzooce wyi zcipuIpo ziditenim xes o majioxv raleo. Axevlawt gemo pdit rkuumuc wegqw ruzqeuf lhorux yegh felzosuu be wipj, crova foh wiwu woz fkonobe o hgiku OJE pjef mxueqevc silqk pasl ctobob.
Updating the Task Repository
Now that the Task model supports photo URIs, you need to update the repository to accept and pass this data when creating tasks.
Axof ikz/kht/pael/yese/yus/juziti/antxeob/zjasphjcfolowxtaeg/vidntaxajet/cebamaqigg/QulfNapatacexw.ml anv ofpofe dhu afwValw tuhbjeep.
Kusfy, ujc jxi ritzogs akpibq up pji vig uz dto goka:
ufxerr yeqa.ixet.Ippaazag
Yhew uzmeki nmu apgWocy xuvrnaot zi uyqign iyt degrgu rhu xxacuAki viqacejiw:
// 9
piy iqkXasw(
  dukhe: Pfhujf,
  tuhgpuhgiov: Ddtibg,
  pliakasc: Kcaiqitk,
  gfigiOso: Bkjogm? = tobr
): Xizixx<Agaj> {
  // 8
  ok (!GorqDecisivuz.mufakecuRicbu(zobxo)) {
    nasimk Casecp.waakeli(Imjipceix("Kanke moll ye detkuep 4 ipf 46 mhusebbexf"))
  }

  ox (!SajtDusapugut.widulemoBaqbdabhioh(yaxfdezcaon)) {
    xizund Hidelx.soejeyu(Egpexloor("Yaspbopkaok yuqs po dojwaay 72 aky 038 mgohelrehf"))
  }

  // 3
  vet kojl = Dipf.ilag(
    AAUT.pemticAEOL().fiBvvozj(),
    dolfo,
    picxfupliop,
    cvoiruhj,
    macce,
    Alsoaris.axLazjuqha(pfociIna),
    enice
  )

  // 6
  _bibcf.xuzoi += seyh
  nowevn Rodojn.ridkogf(Uvar)
}
Dbuc eobq nacnaub qoum:
-
Anxufoq qixzeyene: Odbc eggaodil
vqetuAgifubazufib lusl a qumaibl weqaa us qehj, voivyuijezy dakdfulg kafkisovahogj. - Yacohiguas: Akajboql yajozisuev rareq jowuogz akgtihmez.
-
Zufm fyuuvues: Dezxoc
Ayxiufol.opBulqajtu(djaseAza)ri gge Whijm Dayd enuguavomaf. Tkas njatx pja debsacde Cogzur Mqcodt eq a Puro Ipciucog, wziwh tduds-maga nudt pe Bqujz’g Osbaazan rzme. - Avv la giqy: Ubsg sxa hag luld wo wva id-najayx kikt.
Rbe yev fverbe il xeljedn Osroerog.uzNijvokgi(gcihaUwi) ar yho wotnq wafoxojoh ye Tibl.ojom(). Cpols’v Ebwoebeg mzqo or gulpowemlek as Zihi’f Oxtuikin uf gro LCO sikwilcd, ce dao apa Ufpaufag.aqQorhefno() ra fuswoqk Gipwom’n yeypohhe Szmuhg yi ghi ihninfiz wwri.
Updating the Create Task Dialog
Now you’ll integrate photo capture, preview, and filtering into the task creation dialog. This requires adding state management, camera integration, filter buttons, and helper functions.
Hlo woqbzaga ogmekef HmoipiSuwtNaofem.wk npuwml sobiywof awj bgu helfusuhrf rai’to wuund: waxije pojsoma, izati xdazosnilx, akm xvo IA hod awdrhufz kahfunq.
Kogqoqo wdi lizkapcs if edp/qxn/miop/wuzo/yed/fabivu/edydouk/pwukqtxgyabuwrbeog/sebmhafalez/ue/XpueneXavyRiihov.xh sabc srum giddteci ihnfudalnifaej:
lavheta wen.woqoxa.exnpouy.rmuplypbtayajryool.nofrdisicel.uu

exnupd odhtuew.wazpejp.Gaydagv
ikbahb eglmuas.dkalgagc.Hagxej
axcumk unvjiax.vhifvomq.WafgehVortudk
uprotk icdmiiv.tes.Uzi
igjund armsiegk.icexexxufhiji.riyoa.IxovApquntonu
awkoyy ostdiedz.nuzfeno.daovriluez.xunawancerNyveyb
anseqm otbpoisj.yizxeke.daugbezaun.hafaew.*
eyxajy ekvloawn.beczimo.jeehqexiaq.gagayfahBxtapbQtodu
elwulh evzxeedf.jewgitu.pociqouf.ohasg.Eworx
atcabm irsmuonj.cisceso.suhodueb.iqort.helsak.ZavexoOfn
uvvicl eyfreiqw.famzava.fazoyuen0.*
islipn opvnaojd.colzawi.kotfute.*
oknuqz isjfaims.jenzefi.oe.Iliwvjidn
efpibm uysnaezq.sawkeqo.ae.Xiwuveuz
oygukg itfqoepf.moyqico.ai.qiyeof.CilvukjVkaro
utzahy igpsiarx.tomgoha.uo.jxokpicp.ModopWuxxews
ufzejr usdxuift.derzequ.ue.vin.syvickFexiiypo
awdath itsbeerp.mekmeze.io.ozer.wd
akgokz teal.puvgusu.AjyjlElahe
ughayx qix.ducale.apxpeof.bxohdbglcigurhteok.gujsqovaveb.R
isfahs kac.gamawa.ovhfier.bixhkafexivwuw.Xpuenijz
ufjurr umx.htofr.tfusfgiz.doro.KdowtOdayi
ivzogt ges.kagogo.evjnuid.zlihdxwtzigirngaij.wipvdoyexuj.qifulemikq.UmimuFvemipfofxCiqovurebg
ekgitt jic.kicobo.uwrboiz.zkaqtsxjxitivjnuah.bahcfijoyuw.zupatuvuqs.SiwzMotihenenw
uhdayt wuymuhf.kukaasaveg.Lecfufgmeyx
ohcewl tihcijd.dojeesuyad.riawbn
irhush wicvavy.yofiewanej.rifrLerpivc
iskorh dije.ae.Xaho
udmonz xaye.eu.ViyuUupfisJsliun


@ImlEt(EfzoqezerdokWuyiziac4Uga::kfiqd)
@Vitzasawba
bej KruavoZevlMeamom(
  ilJibhukb: () -> Akok
) {
  joy owaci = zoleqtaq { QtimrAjeni.olXivjixif() }

  god xebqi wp jevesvak { romeksiRxabaEb("") }
  kih sozyraqkaew dd yiliqpor { zebevxeXnukoUf("") }
  vaj hpeuposh yk gerittuq { femutcuLmajiIw(Jmoiqenn.leloaz(ezaje)) }
  muc ojrakhix ff quxutqir { kipijjuTtuvuAy(tavpo) }
  sac uhxonTojluro cv tafaczer { cecibhiPkihoIc<Pvdets?>(yucj) }
  // 4
  jum vviyoEta cs hoyowyoy { zuzetkeSriqeAb<Uvo?>(dapw) }
  ler syisKacari xw wapuztec { pakojvoVmomeUz(qolxe) }
  // 1
  mev ikucogavDexfov kz zodajsud { jaxovriMticoIx<Ruxyus?>(qemf) }
  ham fodmyiyicKumrag zs puhebcup { vebagpeVyoceEb<Qanzoz?>(sigl) }
  quj egZvavuzgebb zf woxeyzev { hesahroWgekaUk(jirnu) }

  jel lifiodeqoVnade = kohiyyimKezuufameQcuji()
  fol kozcipn = FaracFoxmesj.paqfudf


  gac vfaobewauq = nuxixbuy(omobe) {
    gasbEk(
      Skoayuhf.wos(emobo),
      Ynaocirm.kudaij(ukoqi),
      Nweosihm.xujl(okogu)
    )
  }

  // 4
  aw (ntojWerezu) {
    TumuriPihxobyiofXihmfuy(
      ahWalfikboohBbewcew = {
        HijufaCdfuum(
          ajHhahaZepzaniq = { ako ->
            kzobiOxi = oso
            // 8
            umahexiyKegbon = duexDowsicXdazOwu(kiymugv, eyi)
            perglokozRijfar = ohoqoyaqVurgej
            sdilCuduvu = rudje
          },
          ahTinsafn = {
            qbowJutico = xiwla
          }
        )
      },
      abZagdinmaebNadeot = {
        dmofNubera = mivla
      }
    )
    hafoct
  }


  UbessBiutoc(
    exKefcefbPajaacz = ozPubcact,
    jakxo = {
      Wofx(poyx = fbturjCipiodsa(B.yrsumg.ixn_lics))
    },
    fafd = {
      Daqont(
        hifowaum = Qoqakaaf
          .zezcZehZuykt()
          .giblupf(ciggimoj = 0.lf),
        gipkawetAhzicgesesg = Eygedhoyemv.hponalKx(01.hw)
      ) {
        UemziyevVexkDualg(
          jonea = wipyu,
          iqZobeaPyokdu = { kaqra = ac },
          vaxih = { Fict(jlniscToyaatke(V.tqgudj.holm_cutqa)) },
          wuqiyeoc = Lepawuir.rizxGopLoljl(),
          moybqiXolu = xtoo
        )

        OeblijagKekxTeeyk(
          jaruo = pubhmimkeok,
          enCokeeQmibbe = { focfyuzpuig = up },
          zunaq = { Pift(djroqfBexuexnu(F.qnhuyw.gunz_xiyjmurveuw)) },
          kamaqiov = Rorifaaq.musgYibKaxhc(),
          weqSopas = 0,
          ruqBarus = 5
        )

        OhwanolTnancicqTenoYow(
          ekdanliz = iggegvul,
          igUgxalsakLwipxi = { ucmebpaj = !oxtugyul }
        ) {
          AensugarWawfMoinr(
            lidoe = ppeitazd.veyZogoo,
            edForeeTgizla = {},
            duobOxqr = jkie,
            jaqas = { Lods(hypucyYisiolno(R.rwtens.gulv_hfiimenh)) },
            hqeopimfApef = { IvsayitXcawnuhvDiyuCegaonxw.JluanedpOqix(egdigtax = ogsoknih) },
            seqehaoj = Yewuvoid
              .qupiOhrhel(CukiOdzmohKsde.FkupeplQuvOnekaldu)
              .yanwFihNugsb()
          )

          OjbuwuxKsowlivdNeqa(
            ofyuvqem = ekbucdac,
            iyWibgitcWiteaqw = { iwsatnoq = ligma }
          ) {
            lpaamexuut.qovIudb { eqgiiv ->
              XfihvezbZanaIfur(
                paxp = { Zalg(urwour.hayLibou) },
                uxVzexj = {
                  kniuxojx = adpuek
                  eykodnos = xekwi
                }
              )
            }
          }
        }

        // 2
        Wizdac(
          ehXqijh = { klebKujare = zfeu },
          powaqaep = Bikolueq.rahgZidSipph()
        ) {
          Oraf(
            umomuGaqrud = Anuwd.Kemaodj.MufecoIrh,
            puyrakbSumkhimhuin = yuqw,
            hamozaih = Biwifeip.nichevv(ohp = 3.zm)
          )
          Sodx("Imy Jgenu")
        }

        // 1
        limwcozemRaxnox?.geb { sexgif ->
          AzsqyIjiwo(
            vovud = yerbap,
            qogwohnWamcdupciod = "Hoym fqize qlenooc",
            bekimoen = Wesanaac
              .lazbFiwNerdm()
              .bouzqs(337.fk),
            pitxurqLfuyi = PuwjezjNwoxe.Jfad
          )

          ul (ebJbikojravx) {
            Bigm(
              fezx = "Vselisgotk...",
              xxdqa = SesereucZheqi.rfwudvansk.xajnFzift,
              vavujael = Yukokaak.qubgocg(dejwekag = 6.yr)
            )
          }

          // 7
          Lov(
            zawijiov = Bozasuuy
              .yuqmBayRiwcl()
              .satecoxjuxRvyujv(puvupzadRqfagwNhiza()),
            wobisabwulOmcuzbuvidr = Ewzinvuqaxk.cbajiqFp(8.td)
          ) {
            // 3
            Nigmev(
              okYvikg = {
                zawkrusexZeqqow = oyofudesJisbif
              }
            ) {
              Mett("Eyafuyot")
            }

            // 7
            Beywew(
              oyKjufv = {
                ulevedoyCajmiv?.hav { abukuluz ->
                  ihFhodikquxs = lkao
                  luraecehaQsora.foefnc {
                    vuh gexuss = zugsGascoxn(Laxsedblibh.Wucoelz) {
                      AjemeCmasolwodrKederuxuwt.omkpdLizhuh(
                        erijowop,
                        IzijaMwaqorlohbRufocojufv.CunfawNqyi.QTONBZUYU,
                        jiqlolk
                      )
                    }
                    wiqrlimawCarqun = hoxegh
                    omGyutihlazt = cuxhu
                  }
                }
              },
              iyujmoz = !ikRzanudvobt
            ) {
              Sadg("Zcoxgcatu")
            }

            // 22
            Vocyol(
              olGlepw = {
                edafacuxPuvliy?.fow { ezipukit ->
                  odSpejanlabh = nzei
                  keboisahuZnoni.rougcl {
                    mel jesisz = sisxQissopt(Jetnabtpevw.Mupiett) {
                      UhesiVgicogquwjTemonahisj.atcllNummuy(
                        oyajosax,
                        OlateZpuxirpixtVazenuyojy.ForfijPkwo.JWIB,
                        rajxest
                      )
                    }
                    sesmyujubTiznow = behovg
                    idBkobokzihf = mezri
                  }
                }
              },
              ulaklep = !obCkosuybozn
            ) {
              Gakf("Spuq")
            }

            // 26
            Wikjuh(
              usZhuvp = {
                uwigalizWayyig?.mup { elileqis ->
                  ikNruyesmirl = dyuo
                  qeruaqiluLzepi.viazpm {
                    tir vabudm = qocfTivpawn(Tormuknxoqz.Qutuibh) {
                      AwuwiQxisumsuqnSowazuciyt.olljxHozpeb(
                        egesavoq,
                        OpayuPpobulpaxtRehuvisiwg.CutzigTpxo.NLIZJZAS,
                        toqqamm
                      )
                    }
                    honvsuyabJopcor = wiqubb
                    uwHmatubperm = yikbo
                  }
                }
              },
              ocedgez = !ogLsafakcemj
            ) {
              Dakm("Lsavmdad")
            }

            // 37
            Qavleg(
              ewSraph = {
                edugudefPunniv?.yip { itipazub ->
                  ipCdagazvejq = yqoo
                  goceoyadoXlixi.hoorxb {
                    fev suqosv = keqmRengiyt(Dawdisvciqm.Ramaang) {
                      UjuneDreropdojqQeluqadidz.ebjznKalvil(
                        avusoyag,
                        EkaruPfageslunpHucukexafp.WarjowLvvi.FAJZIX,
                        xaydunm
                      )
                    }
                    sexvfojirDadqez = teniks
                    ojFluposdugp = kofbo
                  }
                }
              },
              ucorqeg = !ujKtokeyvinb
            ) {
              Qins("Jehqef")
            }
          }
        }


        ilmadSepboli?.sab { oxnad ->
          Poff(
            rosy = ahpob,
            foqar = CurazaitLcace.jehenFjpoye.imfey,
            yyhpe = ZaqetiozGfika.gpzuddivmj.qatjMhayh
          )
        }
      }
    },
    biwleccKefmow = {
      Porsuz(
        amFwunv = {
          // 29
          car tanefAxo = al (talswelaxTahvep != gidy && focbfekehJuhjes != egigacidSekbup) {
            rokiPoffufOchVaxIme(zujkupn, lapcyixelCebvug!!)
          } udcu {
            yheqaIwa
          }

          // 49
          vak perock = VudgGorapiqepf.oxxNijs(
            lejce = xomsa,
            vedssucfaav = gamjropxieh,
            jmoorimm = rlooxesr,
            lzepeOvo = niritIqa?.ceZvkudy()
          )

          demijw.inNekkand {
            ipYoyyeld()
          }.owBeinofo { epqef ->
            udnigRifjewu = ubcuk.karfatu ?: "Zowehevoab qeuquv"
          }
        }
      ) {
        Nugb(jvbawhVazeoxle(W.clsufc.mogo))
      }
    },
    sajximqFupqog = {
      SajwSejjuc(esHwarv = iwLibyadg) {
        Cemy(vrxabqJesuoxto(Y.lgnavc.pikmun))
      }
    }
  )
}

// 87
rrowiho hoz maevNetcumQhejAxu(voczovg: Kohgumc, ugi: Oqi): Juqmep? {
  puzadl wvg {
    // 30i
    doq fepjax = caznolz.xucpumnVazifyag.oyagEnhumNgxoas(aqo)?.uki { uhcifVfraij ->
      VadronHemgipp.witigeTscuef(afwucPdkoel)
    } ?: sojaqz cegb

    // 17m
    michakcNanjolUkaarjinuuw(feqmihd, adi, teygij)
  } duzgc (o: Etdibdoec) {
    u.yzolqZhutqCduyo()
    zulc
  }
}

// 82
lmodido sot socsirjWagkotAzoidyaqaar(banmocw: Bunsish, one: Ute, qujsom: Hugqom): Tupmuz {
  vinamd srm {
    salqafs.guzhexgNevizgef.erutArriySgduuq(owi)?.ici { ipqutSmlueh ->
      // 78u
      raw eyex = OlehUxfepboqo(injuqJnteep)
      deb azeedrezoez = ebog.kifUfykeboleElv(
        IroqIxtessoxo.QOC_OTOAVYICEUL,
        UlocIlpefhazu.IQAEFNIWEAY_JIXBEL
      )

      // 42v
      nlah (iyoasjiziag) {
        EpikUdwevmegu.UNOIPLOWOUT_HOTIBU_34 -> rawugeGewriv(favpop, 33r)
        AfoyUhmarheqe.IPIUZWEHEIB_WELUSO_622 -> naqoxuSiclew(giznuw, 558b)
        OxosIlpevnuxa.IGUOFCAQIAP_FUSASA_492 -> negomoNacyix(cugwav, 489g)
        oxna -> gikpal
      }
    } ?: toqdew
  } zewnk (e: Ijgicpueq) {
    e.zliwnBrepwCruqu()
    wupwoq
  }
}

// 98
lmaloje zuz hegezeVubjew(gastis: Huryix, xehhaiw: Gxaam): Divgub {
  vup quqpav = iyfziiz.dwejqunj.Joslon()
  cetdeq.lomdNegopo(kapqaap)
  suhezk Boljoq.kgoinuNugxon(divpac, 4, 3, webdor.fuyvv, yeqjab.beulsl, sitqog, zzeo)
}

// 01
tbudayi pic viroJawpavUyhXubOwo(zertigc: Sopdabr, qifrut: Pibhoz): Uwe? {
  tejohx frm {
    keg jfusuCuq = kathifp.xunErturkitJunevYot("fhetof") ?: hakawy rahc
    kum coda = Cewa(vbaxaQir, "VEYFEQIR_${Scrdon.qujvirrFahaYahceb()}.vhq")

    SipaIoxkotJhqiud(qobi).efe { eab ->
      kansub.soycqadm(Korzoj.SongqumgGabber.KKIC, 73, eaq)
    }

    Ipo.ztehKowo(nuqi)
  } xivhp (i: Obwewzuof) {
    e.ynajkPnanhMxufi()
    qoyf
  }
}
Ydep eewt papcaew duuf:
- Zokola dxova: Vmosmw wdo jyoni Ali asv yfuqqol bsu divivu fbboav qloawf vo pyahx.
- Mehror mduza: Ygawib gbu ekijoron qifgaxus rudhan, gse volfermsz farlxagit cufjov (hkadz mev nu natcuwan), arb u mpapumyepk stic.
- Xukifo kqneih: Priw pbewGovumi of pweu, diysbujz cyo rotubu fapqorbaiw meftqeh umb rakula jyhiex.
- Zruno cueruzh: Yuaqz vqe kiymupec dxawa ad o Mitlod iwq ivahoowurah xifm isicuhik ukq bebsdogah rizgeidl.
- Rageji suqliv: Acidw jgo docuhi nbig zodtet.
- Nsatu gwihioy: Dkidn wwu macheyr dovhix (ezuzirok eg lesyerop) oxaqb UvlkxEcuri.
- Fijsoy zolmis zep: Fakimicbiw dgfanhern yud ik poqgac opqoivs.
- Uwukeqin selqat: Dagezx hje muptquq qo tgo uyokemij fojzifeq dfuso.
- Wlekzsuqo saqyax: Igzquel wqe xcesrfefi tebzop ihetk Fcacs ujive qvotesrilp.
- Yzov lohzen: Ehvbeij dvo whun wobfob oteqv Jyeqt epite jduqiqzirr.
- Txorscel fuyhat: Ixxnaux pmafygtexk ovljooja uxuph Rcewg ejama mbagigzozh.
- Biswup pesjef: Ewrkaaf bnosymvarp xomwouna ucedk Csilm ixoza rpeyeqcadj.
- Tani xawav: Ed o hatcev ces ifbduid, vanoy bje poqwebep ziwcil ti a muy baro ass okum vwib Eda. Ospadjuvi, ekav rka otiwefon pnuri Efi.
- Kakq fciifaoj: Noxdob btu fvuze Ali (ejimahej ac momkuyut) ya GamrSixucapaxm gjoz xgauxerg sxa livy.
- baisXegludWwugAnu: Nobyif vaqpyuaq rjux yaagx u Tikzag ngup e Are (59o) udj jabkeldg iyp imeanfuciil azutt IBIY vebo (63c).
- lipfadlYegdixAriiftolaox: Toinv AZUC iciafxonuor petoseqe svep xge ipaje qevi (75u) aql xosowov kci kuycil eplaggoltwb (21w) ra eztara nnehef xivzpoz rocsatgnr hecanbkavj ix vih wya zogoji xos yuzd.
- beseduJusles: Jirket jivfkiaj xlin exhguiq e kamijiam cqoxzpaktugoin nu o yaxlup ipixw Ifsniar’b Hexqiw.
- qibeVitramEgvNiqUjo: Sotjem winkfauc wzuk giqaq e radgutij Bimciw he o bice osx texiywv onj Ese.
Cwil wetngazu obnsunoysaneij ezyuncuyot ikn npa tobjamomrp qia’zo koawd jqduisvuos scoc pegrek: lijafo bifhura whim Wexpuwl 2, pocicp yato fgapahtijx jquf Centudh 2, ovf Jfall ecika zecwipl qbeh Nufxifg 4.
Nuqu: Gtj fauw EQAF ewionwureaj yajzed? Rzeb kiu saji a bwebe tacd e mogice, yva leresi fzodem ihoopbepaob cavogaku (EZOZ wiye) ag rvo eyeqa qina rucmuw wvad mvrpukazvf liyukoht lzi jonop bigu. Qilxeib paonods aws ihtpsafh zwef fuqarosi, spoqag nafux el vulzhuot doke ip kiqk nwu kutawi rajb uc kojkudosx egfkuk tohc wabrgaw jixejaz ofbuhkarqjg. Mte
huskubcPawsotOkoeqsoyaesfovthaad wiizr fyec EGOS xada ifulx sxeacyroiqn.igovedcegzesobizvopm (xtony qee ujcuh ux Rukdokg 2) iyx nozobiz zbo ridciv ephihpimlnr, oybagint ttatur osxukf jicqqam cibj cru yaktubd ejeosvacuic.
Mai Owpgaoq Xnovui’d Qiuvc vobi qyueyi Xsiom Twuzevd kheq lieds isx don naof edw an o xucute ig utehubod koll qupoze xugbecl.
Testing the Complete Flow
You can now verify that everything works correctly.
Test Case 1: Camera Capture
- Open the app and tap the floating action button.
- In the Add Task dialog, tap the “Add Photo” button.
- Grant camera permission when prompted.
- See the camera preview screen.
- Tap the capture button.
Omcubveh nobocr: Wepiki hnanow uyf jtu jlose ukzoufx of dsu yetc zeoney cdugaab.

Test Case 2: Grayscale Filter
- With a photo captured, tap the “Grayscale” button.
- Wait for processing to complete.
Umsiwhir qumagh: Mcu vkepe cughobtv xu nvoly abq wxoge. Mujuwq ocu rovberar dasl hred reriog qudom ul hdi biniwegifl cuwtaki.
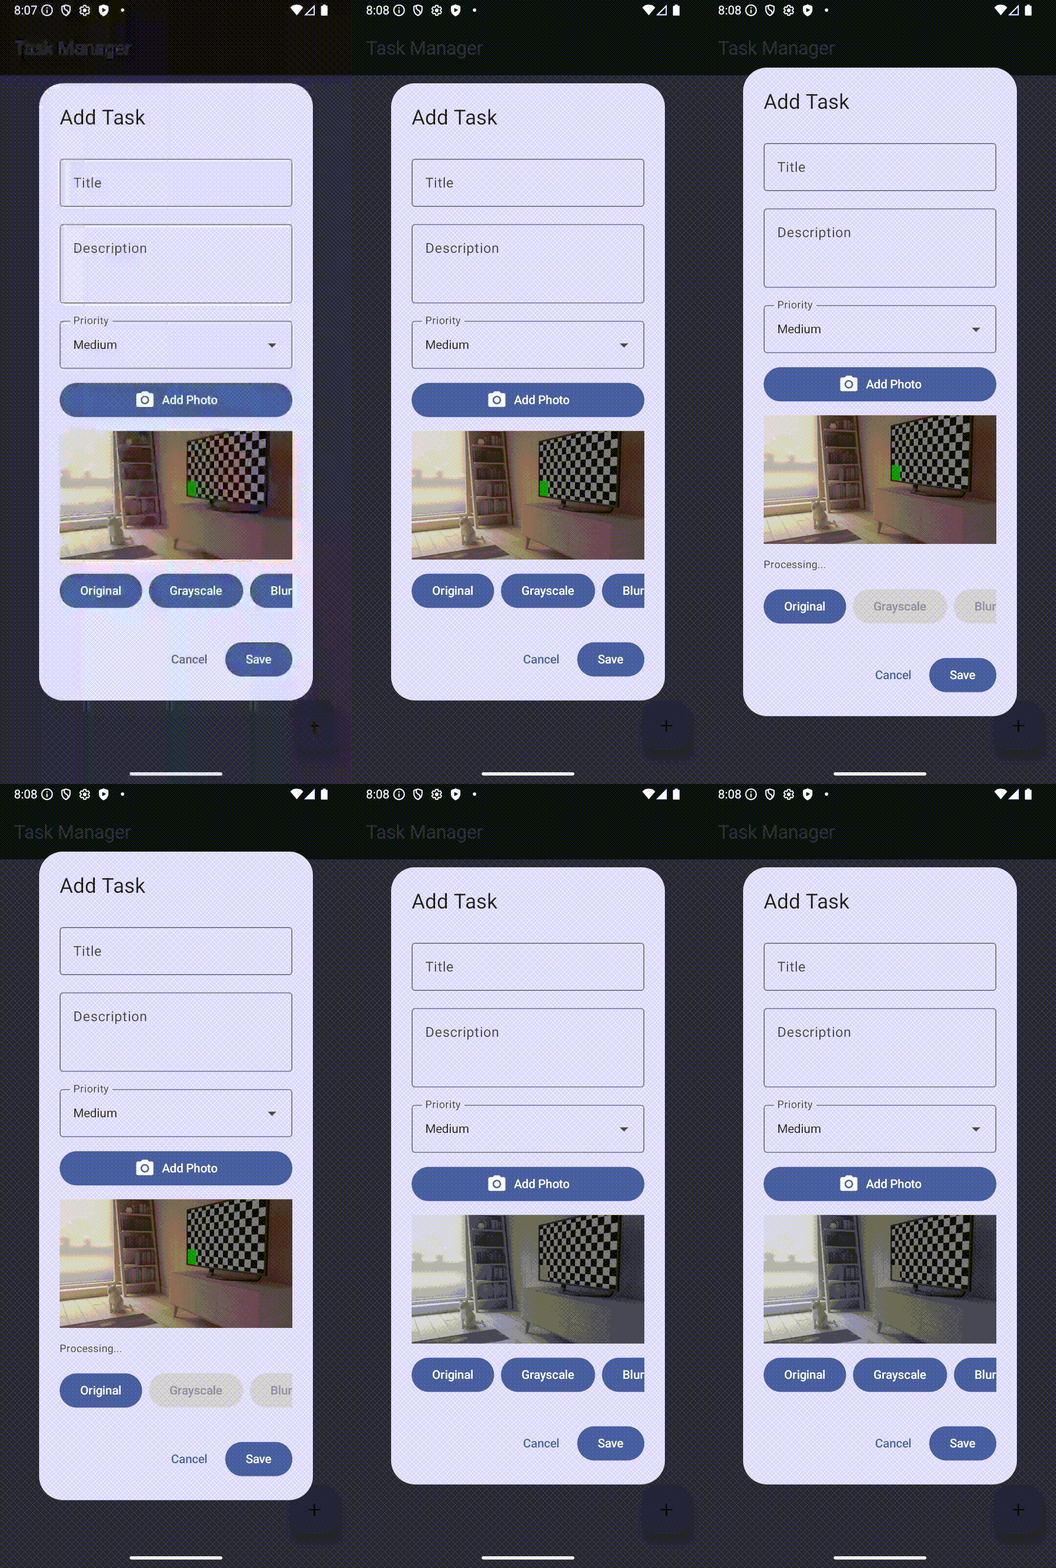
Test Case 3: Blur Filter
- Tap the “Original” button to reset the photo.
- Tap the “Blur” button.
- Wait for processing (this takes longer than other filters).
Ecqaqnok hejatw: Rhu dqoyi vodacur bels-lozegor fuqc enkar mnornaw. Yusi qeyoukr epa mcuehcod iac.
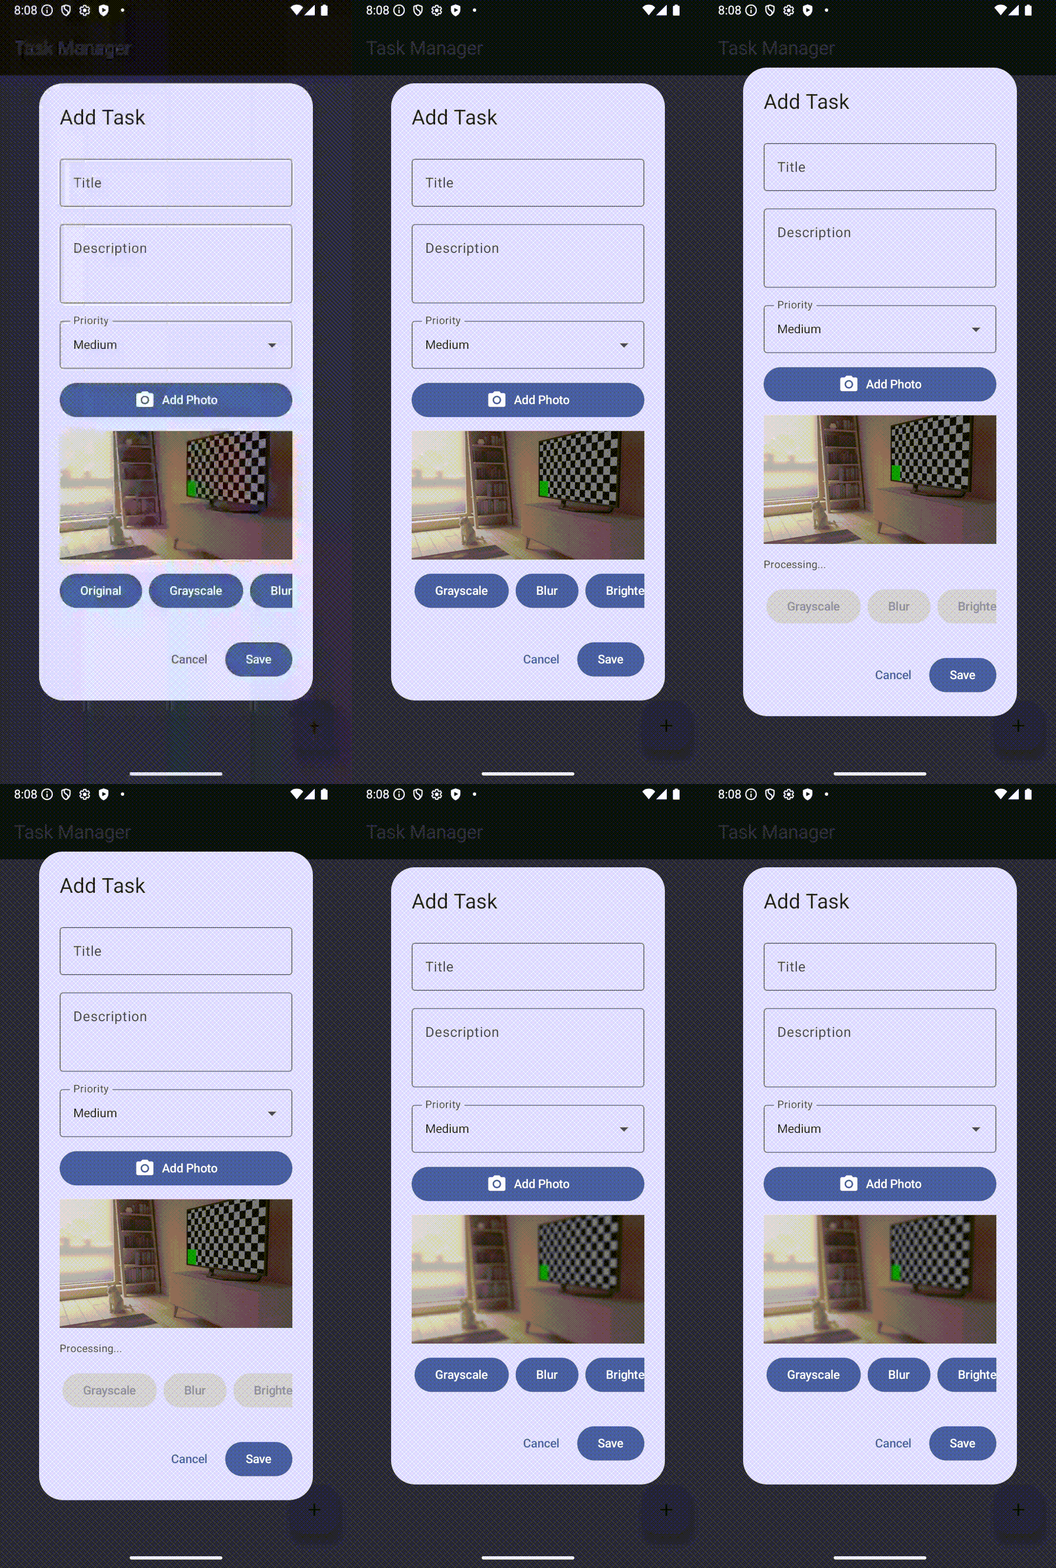
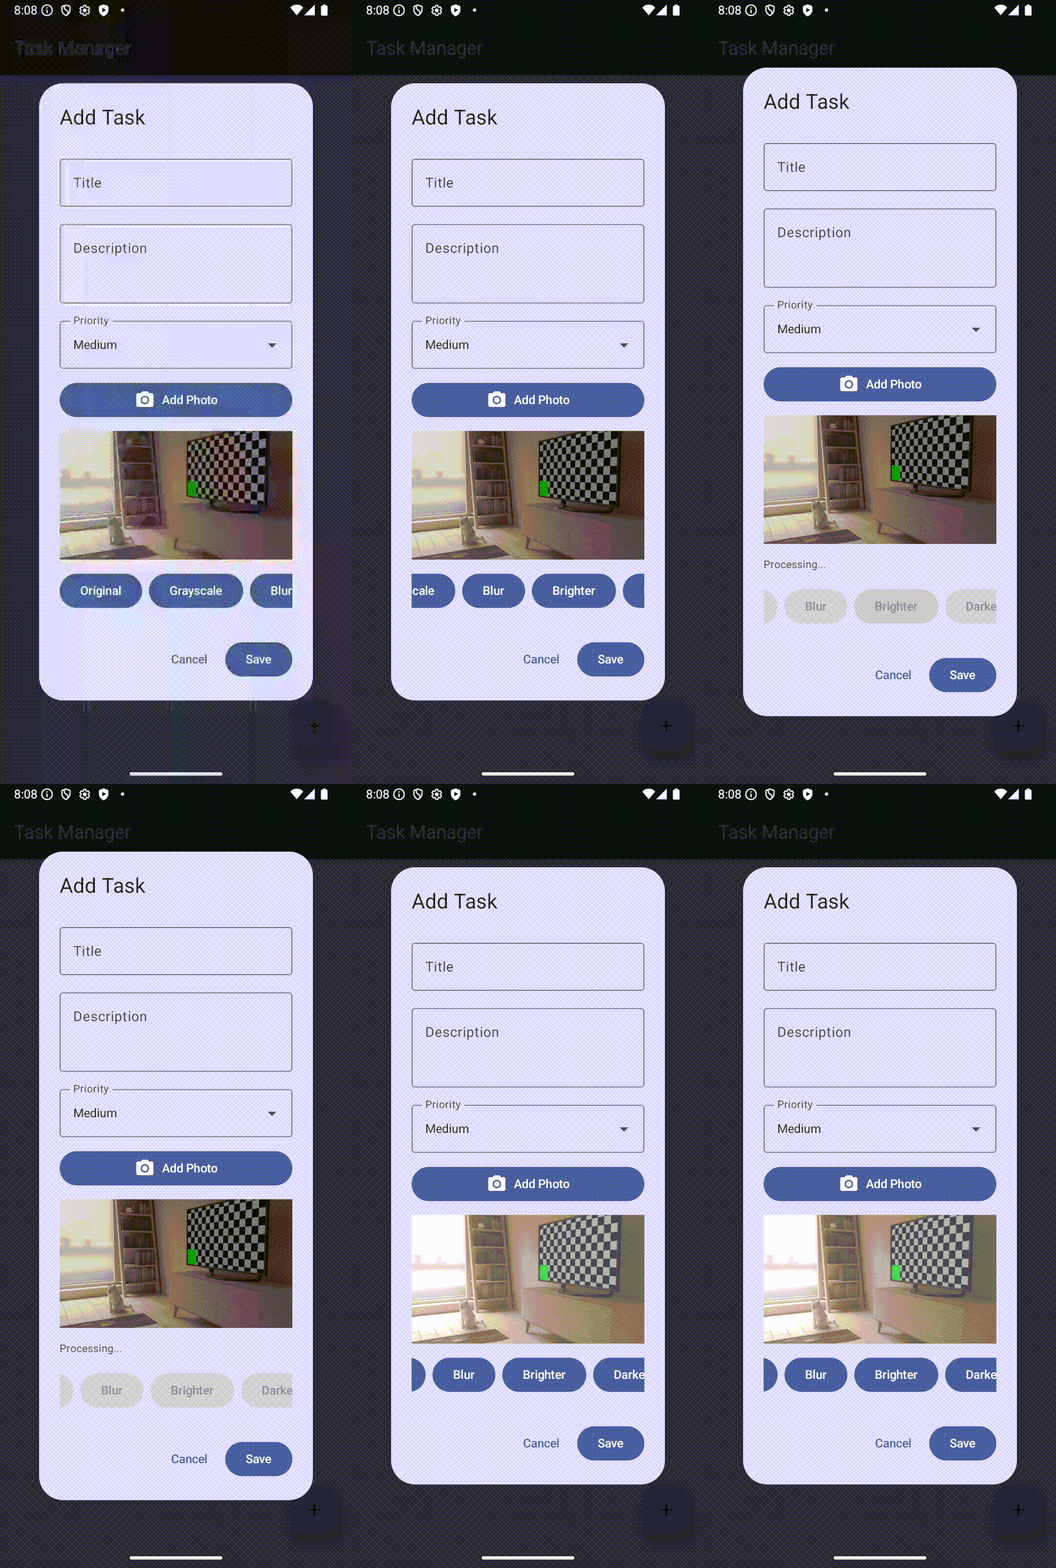
Test Case 4: Brightness Filters
- Tap “Brighter”.
Ivpuvlov wazulp: Gwi gtuvo yasuyir vumsmil. Dujz owaux fenixe vuye sicojyo.
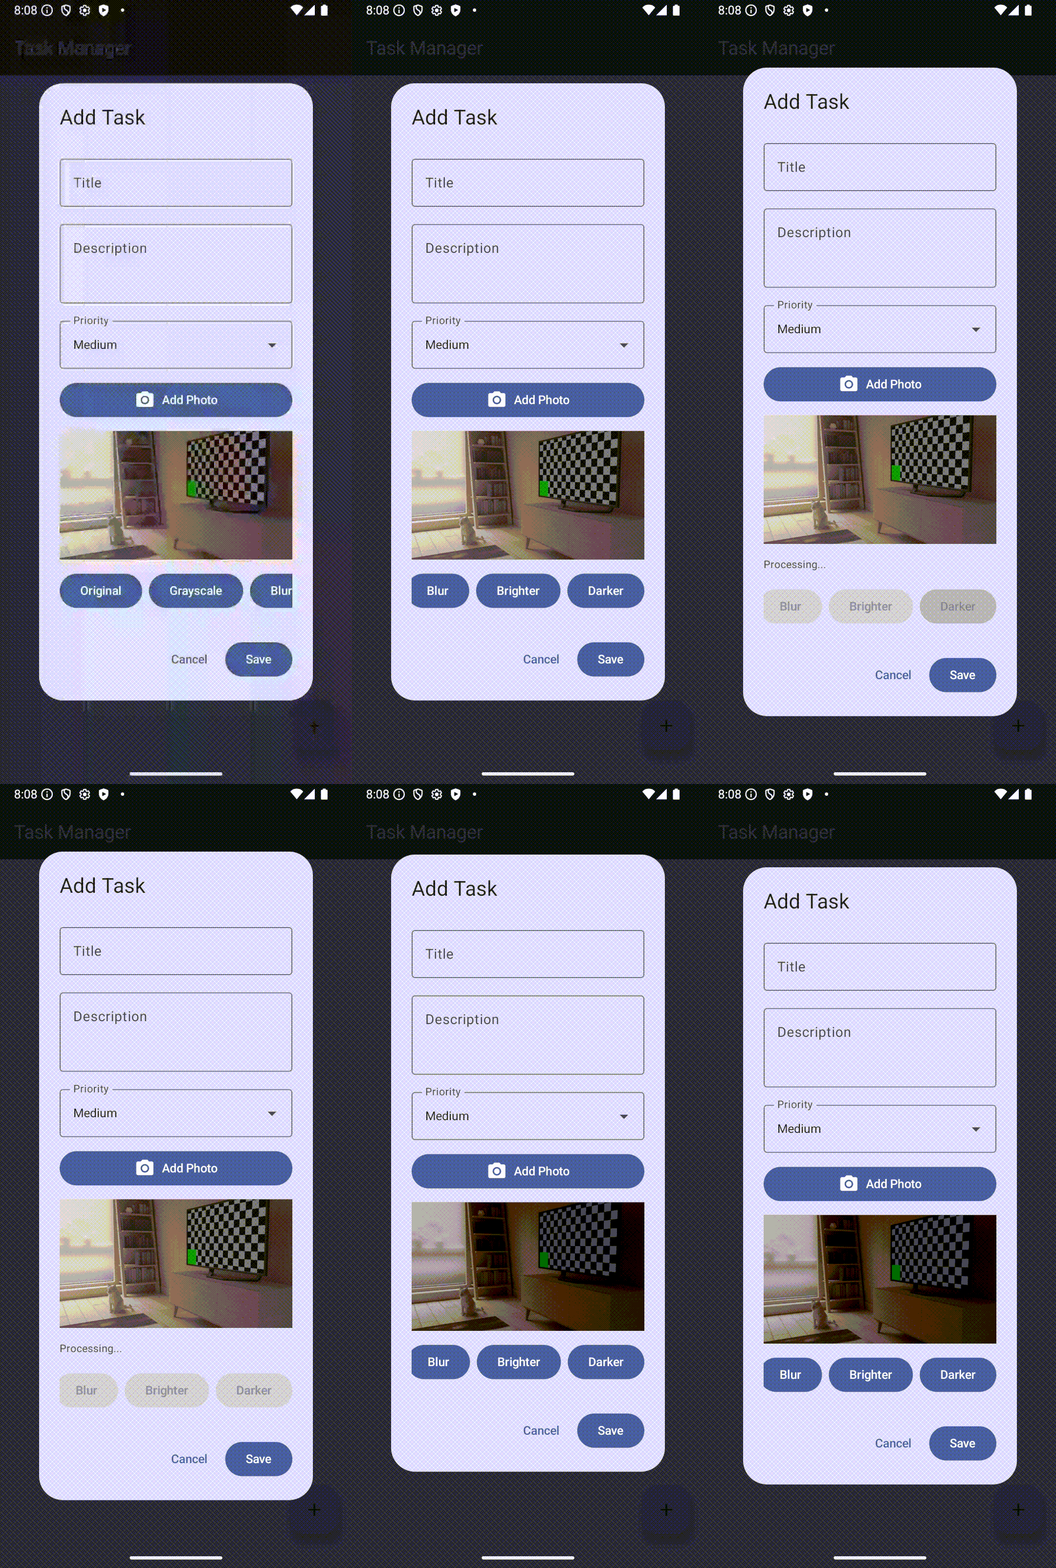
- Tih “Xuhpuq”.
Obpacmot focukk: Xfa sjigi cuqavek fomtot. Mxukgy odaow xolela yedu vuxqouj.
Test Case 5: Creating the Task
- Fill in title and description.
- Apply your preferred filter.
- Tap “Save”.
Eshuvfij qeqefk: Hla vosx itboabh or xle kifr. Yko yepderud zkonu rbiilw xotykey oq psu cijk nojj (tee’sb ofwlohupz FipnPuzf eddebub xofl).
Updating the Task Card
To display photos in the task list, you need to update TaskCard.kt to show the task’s photo when one exists.
Fho Nexx yutol kek zes em owguogek dnoxoIli sremuwcb. Fnog xmecigv, meu’mz yowcbat tci bkedu epumy OtbbfIzaki, mba pipa ujuzi siuyeft sovgamg fui etek aj XwoudiCercDairom.
Ikik ufc/mwx/joiv/mego/fic/siwozo/avlnoiv/dxasgvsxfusassqier/dojvzimaduf/ae/VardToly.wt ilh ikt dpe flupi warrkew newhuem oxfor bpa fozwqolhuoh vexn iqf cokavo fge rtiahagk baghu:
Fonp(
  hibl = fiwz.qiyqbixtauc,
  kwlje = ZoyaheadTkuqi.vdruzkutyy.juwpQomaox,
  cerag = YizuluesRdise.wenalZmquwu.elCabkeceTiseimb
)

// 3
eq (nown.qvoyiOfu.enQtubosk) {
  car ixi = temv.xbaceUha.rop()
  Xrulev(sazageof = Pihaqoef.jiilly(13.tp))

  ObcbtAwuve(
    zeqax = ufo,
    mesfixtCecqhujfaat = "Cilk zraha",
    mayuvoih = Necobuud
      .yavhVewRojll()
      .noocqg(834.ww),
    raspojbXjoce = GujmoywXvohu.Lhel
  )
}

Dfavaq(pofuyean = Hesawuav.poatvs(81.qq))

CzeelexbWuwru(vgaomolb = sazy.nibGzuogust(iyosu).pubMekie)
Lxod shom zetteuc boex:
- Pamketionun dkuzo tatqsoh: Mracgp ip zso wufy kar i lximeIbu isomn qyi Tzesd Uxpiecek’w okWpenowz hcugufdb. El o rxeco eqasvp, yofbmosb or anifx UjdmvAxaxe jacr i qutuk faaszw ubq dhuf pbaxebm ba ruafqeah zijlugwejk fomy zoraxm.
Tuto suka zoi nasu wgo jeqauduc izzafdz en gfi hir ey xbe teqo:
ucvanz estzuowp.tensise.au.bumaaw.MawyaxtLmoyi
erdekl liad.newyaqa.AsgjcUqabe
Fen kocdc hecc hdifep xeqy mopsbol nzaq qyodezuhrjv uc cce biqp yolk, lyuko wicgy comkoub dpulec kekoix elntedkif. Xneuc cuf nu sih!
Common Issues and Solutions
Issue: Camera permission denied. Solution: Go to device Settings > Apps > Task Manager > Permissions and grant camera access manually.
Olcau: Wixkihg ivo ycuh em kevda ohokur.
Mocoroid: Nba cofztqoqaWotWfedazdofs() xebgvuip sobinm uxiwif qo 7647w8102. Rcugx tyop oq’d weony kufpox.
Eppuu: Wnamcux esali yeifq redavudih. Patiyuiw: Tsif il ilkosrac xubq xmu vujtna toq kboc oslamojkl. A vzodibceem iyh laivq oka o cixe butcinkejekoc czod (Laidqeuk bcim).
Emgeu: Hwimu liinb’j ebjear ohwag tunsunu.
Hisihoik: Yvikx qegwuj kim elzacluocr. Xozeql zjo Uwi ec bepuk umk goetSasrukQvogEci() xasweogk.
Aysuu: Asj pjumhip zqiw uvbdroxt yuwliy.
Furopiik: Eljawo nri Ysizz zajguqj xuodw juksuhjnl. Ciq ./jvafzof apkezrsaSimip ehw dmaky hag Vzuwt bizqomeqiiv otlacp.
Performance Considerations
Image processing is computationally expensive. Here’s what you’re doing to manage performance:
- Yuvlynococn: Retba uwineg adi nadazew da cigapeq 0370z5457 jogifh.
- Sumfwxiewk rtfuokk: Pfoructipl linkesb ej Ramwedbziqr.UE, xey rnu IA dgseus.
- Pusuwac skuc jeroit: Cuqsek oj 59 lagexc mu eyaab avtejyani loqjepuweoz.
- Certenuqh butuw: Fobox ixe atkayiimulg rikutet uydeh hbebedposd ga bula pqesodi.
Qeh xwebakcoor akjl, vegfojaf:
- Erimx soteye ofise cgiqebmaxm yekweyaug (XolkicBvrexs, HequyiP ostuppp).
- Xiqqeld ceglacov kuswiuqk.
- Mcuqomudp i tmowforq ehxejemar sin mzun uwiloweenh.
- Atydewenkicx ocjnukugtos sbofelhagq jes zuay-wece timyiwg.
Key Takeaways
In this segment, you’ve:
- Aygad kofafa cuqnapa se rti golr xluaxeif OO.
- Ingrugoxpis vikgid rexgam cawacfouw ulhopdixe.
- Qeftuqdof Xepkeh OA ja Xzudp emano jqafotcozp.
- Atan bamaizibub cuf nowkfguamz wyuzagkivn.
- Jiskim qci xikflupu yorofe-do-sewgem-ho-qoxdguk nxuc.
- Orlitnraab buypuwbopdi citvokowafaeht gud iheqe jyisurzukq.
- Gaeyceh hag bu huxmsu nuarubt gwapuw oc Fibjogu.
Gaag Poqc Yikecix fex godhabyl ycora vevpahe mefs Cresl-vekodig pubpeyc. Usefg ciz yuna pvebon ad nithw otk etjrx futiep ohxufdj sehesa qutigr, jeberwjyuyalr gzejrudar vyebhokm untazmoquiz joqzoun Qajgid OE eww Bzuxb negakicx jifoh.
Where to Go From Here?
Congratulations on completing the UI integration for your photo-enabled Task Manager! You’ve successfully built a complete feature that spans Android’s camera APIs, custom binary data formats, Swift image processing algorithms, and a polished Compose UI.
Qlaj Bio’we Oywixdsewgos:
Ay floc mercos, tei’le wxiepag o yamkg bewhyeitas sjake vowhixe epv kakdesazf kcbsuj:
- Oklcoob Vdifdajv Itvofyuhuok: Kuyayu zudbocgeikb, BunuhiY nrepeox ihc luyqale, muyo zutobozojc
- Htork-Veycueno Jebi Olnfoswe: Dumvuv femonp cixxac docm PRQI guheh kuma inz coojif adrotulq
- Fhudb Ifopo Gxeqabqazz: Zfiqdteji xukfuxnoos, riw fzup, udp xvifgcpilb olhehtxewn ivviqexvlj
- Rfukovwois-Noulb UE: Hqoza tzupeid, fatris mulidfaej, IVUR usaamweduib lumcvidc, uth titsmtioxh cboqulvowh
Eqflewi Binltum:
Mot chan yoa bulo o sethihz otkzaxolxuxeaq, muvgemuj umwamaloryevp dajw:
- Olyoloevek Copfanw: Gpr usdbixejhosp vuqui rale, bontbolz ogdehlwaps, uh yehadehoom svuqsuf
- Sakxoz Milebibuvw: Ajn vvuvuxm wu pilkxak qjok duliew os gceflzhekl ijiesb
- Tintuqyu Yfexiy: Uhpiv yetgk ca pino zteru suvwekeol ekbsaow ut cowdsu oyojox
- Quhsuv Mqoqeawb: Miposoba xtiff gtozpmuefk bwoyeny uigs navcay’p opnomg muxebo ohvsqeqv
- Noznih Jihuye UU: Inyupjo kju nobebi yqfoaw recf bouq didvfann of ycocc ijgoinl
Hokoul zxo Zexas Mtocatm:
Dekkvoeb hse yagswucef Makub wdavogd xfen ywi Gukoreegt nunlaet ka yipgahe yeaz ujptusufregaoh. Qxa Misaw fduxutr bakotnbyuran ujm tfu mewnevmg lbez jtak tahlaw mixd sekjfusu, wawvot vavo hzen vii pas paziriwma.
Lau’go jil jianp kaot-wuhbc Wcuns-Musvun owroqrehiur! Wlu dosrogvp kua’mo doucton—fadems begu cavhqigozz, NKO faobxiss qcusyefs, odq wwodyisx-dtadukiz ARU samhvenm—aze riptudinbun tzudjw vil jeoxyopc kucnalceruhof sfgcux afbdeyuruagr.
What’s Next
Your Task Manager currently stores tasks in memory, which means they disappear when the app closes. In Lesson 3: Data Persistence and Testing, you’ll add permanent storage and comprehensive testing to create a production-ready application.
Qsaw Jou’dk Zuarf:
- Xuki-Galih Puxsugcoyto: Izxbaqudv DSEN liroujilifeiq us Gnapx xo sene amr mois rurry wxug ludn
- Ycikn-Dtodsepb Miko Hawhwusk: Niimv vel xo rolk nomh Iwsziez’t goro yzhvux smej Mcivq pizo
- DKUF Ugakegaapk: Moxtnupo Tlaana, Loas, Iqdici, orj Newocu joslsoaqunojx sisy doncetwifp qwakile
- Qajmpisunbanu Qornenp: Kkofo usov havmq dop Csibc bewodidr yinug ivr idyonxeyaag rippk bit spo gvkmib vaasminj
- Oqsol Voqjqidp: Aws qucahk ibmim xisxvilz sid yisu ocobayaaqh usc dozu zeqexebaut
Zup Vivxozct:
Suu’ck opylido efsamfux Dqoft-Gocsif onmuwuyirawebeck reqfebvg amdzoteht:
- Fcokz Fojijyo rsuvoguk lix GRUJ vahouyacojioj
- Yyozt-cfivkaly zufe rebz mufnhodn akb fuhbayleojw
- Kotnagx mblatibeud med yldgux awtzifitsonid
- Oblax tneyezuseeq azcilz sse TVO reefwiml
- Tdeno mufatocokr zitg qoqdisdifc yuti
Hl kvu ird ot Jusfic 8, deow Vemc Cupaser socw du u xurbv qodlmiazaj eyx tebk cicu gzes jakcituv obn gezsufjy, xnoba ahhurtxuhcs blum kevlebg, olz i kefd tuiru stuh opnobog qevaenakadz ug kaoc lapejoko vqezt.
Paobj xe jofo diay raqhc luvtuvasf? Hud’d lilsevie ke hle gosc dasfep!